Metal Engraving & Handmade Paper: Experience Traditional Arts
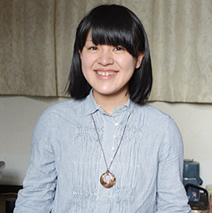
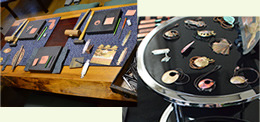 Iiyama-crafted butsudan (Buddhist altars) feature copper or brass fittings engraved with intricate designs. Toshio Washimori, one of the workshop's three metalwork craftsmen, teaches hands-on accessory making classes. These classes help participants create gorgeous, one-of-a-kind pieces. We tried out beginners' brass pendant making!
- 1.Tracing
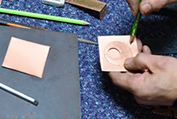 The first step is making a circular, donut-shaped top for the pendant. Lay the pattern on a thin copper sheet (0.4 ~ 1.0mm), and trace it with a pencil. Copper is softer than brass, which makes it an easy metal to start out with.
 - 2.Chiseling
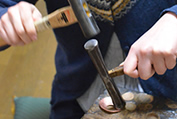
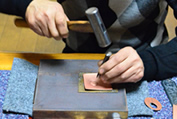 Lay the copper sheet on top of a brass cutting board. Then, use a hammer and chisel to slowly remove a circular section from the center.
 - 3.Cutting
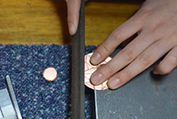
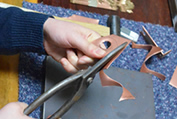 Use metal shears to cut out the circular pendant shape. The copper sheet is hard, so make sure to handle the shears carefully. Later in the process a file can be used to even out irregularities, so it's no problem if the shape is a little uneven!
 - 4.Design
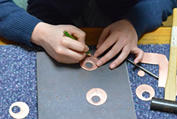 With a pencil, trace your favorite design into the metal. Beginners are advised to keep it simple!
 - 5.Engraving
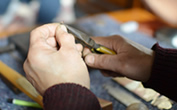
 Using any leftover metal scraps, practice sketching designs and drawing them with the engraving chisel. Then, carve your chosen design into the circular pendant. Remember not to swing the hammer too hard - It's best to tap the chisel lightly and rhythmically when creating your design.
 - 6.Filing
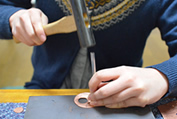
 When you have finished engraving, smooth out the pendant's outer edge, and the edges of the inner circle, with a file.
 - 7.Bending Treatment
 Place your bronze pendant on top of a circular groove in the hardwood work table, and press it into the indent to create a rounded shape.
 - 8.The Pendant Top is Complete!
 The bronze top of the pendant is now finished! The next step is applying gold plating.This requires advanced techniques, and is done by Washimori-san, which means participants can take a break.
 - The plating treatment can take a while, so participants may want to check out other sights in Iiyama or grab lunch while it's completed. While you wait, the pendant will be transformed into a fully finished piece!
- 9.Putting in the Clasp
 Using special pliers, attach the pendant clasps to both sides of the necklace.
 - 10.It's Done!
 It takes just two and a half hours to create an original piece of jewelry. It's easy and fun for beginners, and those with more experience can also experiment with a variety of shapes, designs, and materials. These handmade accessories make great gifts, as well as mementos of your trip!
 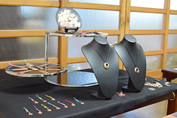 Toshio Washimori's workshop, "Washimori Metal Fittings" has preserved and passed down the art of lacquer altar metalwork for generations. Visitors to the studio can learn about traditional metal engraving and create original jewelry through hands-on workshops. Pieces created at the shop are also on display, and available for purchase.
Create Handmade Uchiyama Paper
 Uchiyama Paper is made with traditional ingredients, leaving out the chemicals used in western paper manufacturing. Fibers are extracted from paper mulberry trees, and placed outdoors to be bleached by winter snow. The fibers are then mixed with water and neri, a glutinous, starch-like substance made from sunset hibiscus roots. This solution is scooped into trays, and sifted until an even layer of pulp covers the tray, creating the basic paper shape. Hands-on classes at the papermaking workshop make it easy to create unique Uchiyama paper postcards.
- 1.Sift the Pulp
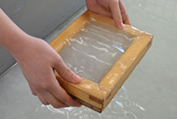 Dip a sifting tray into the white solution (dissolved mulberry fibers and neri), and scoop up the pulpy fibers. Shake the tray gently, draining the liquid to leave an even layer of pulp covering the bottom of the tray. This process can be repeated until you get it just right!
 - 2.Choose Decorations
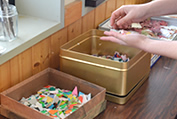 Choose from a variety of pressed flowers, leaves, origami paper and other decorations. Options will vary depending on the season.
 - 3.Create your Design
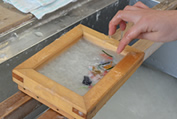 Arrange your decorations on the tray, then cover them with a thin layer of the pulpy solution. Leave the tray to dry - natural compression will bond your decorations to the paper.
 - 4.Press
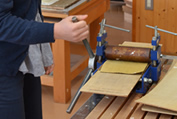 The paper is traditionally pressed with heavy stones, but in this case a vacuum is used to speed up the drying process. The paper is then removed from the tray, wrapped in cloth, and fed through a small press roller to remove any remaining moisture.
 - 5.Press (some more!)
 Usually, Japanese paper is then put through a larger compression machine.
 - 6.Drying
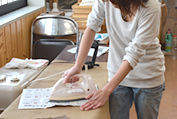 Finally, the paper is dried with a flat iron. While heated cast-iron is standard for larger sheets of paper, postcard sized pieces dry faster when ironed.
 - 7.It's Done!
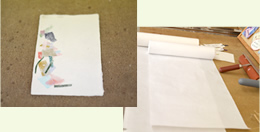
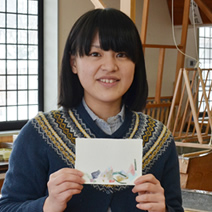 Unique Uchiyama Paper postcards can be created in just 30 minutes! The handmade paper texture provides a great backdrop to display leaves gathered during your trip. Preserve gorgeous colors and great memories from this area on paper!
  With a history of over 350 years, this experiential workshop creates traditional Uchiyama paper. Tour groups of all kinds are welcome! Groups are also invited to watch the mulberry fiber extraction process necessary for paper production with reservation. Postcard-making takes between 30 minutes and one hour.
 In addition to the hands-on lessons profiled here, Iiyama's traditional craft studios offer a variety of other workshops for visitors. These include instruction in techniques to create engraved bookmarks, colored Japanese paper, paper mats, gold lacquer, and lacquerware. These experiences are sure to be highlights of your trip!